This post contains affiliate links.
When you buy something using these retail links, we may get a commission.
I had wanted to make choux pastry for a ridiculously long time.
I love cream puffs, éclairs, profiteroles — basically anything with that light, slightly crisp pastry shell and a creamy filling inside. But somehow, choux pastry always seemed like one of those things that belonged to people who actually knew what they were doing in the kitchen.
You know the type.
The kind of baking where you have to cook dough in a saucepan, add eggs one at a time, somehow make the pastry hollow inside, pipe it into beautiful little shapes and then hope it doesn’t collapse in the oven.
As someone who mostly enjoys simple homemade desserts, I looked at all of that and thought: Yeah. Maybe one day.
Well, that day finally came.
And honestly?
It was much easier than I expected.
There are a few steps that require more attention than my usual baking recipes, so I wouldn’t call choux pastry completely effortless. But it is absolutely achievable for a beginner. And even with my small, inexpensive oven, I ended up with cream puffs that, in my opinion, looked like they came from a bakery.
The first batch was good.
The second batch?
I was ridiculously proud of it.
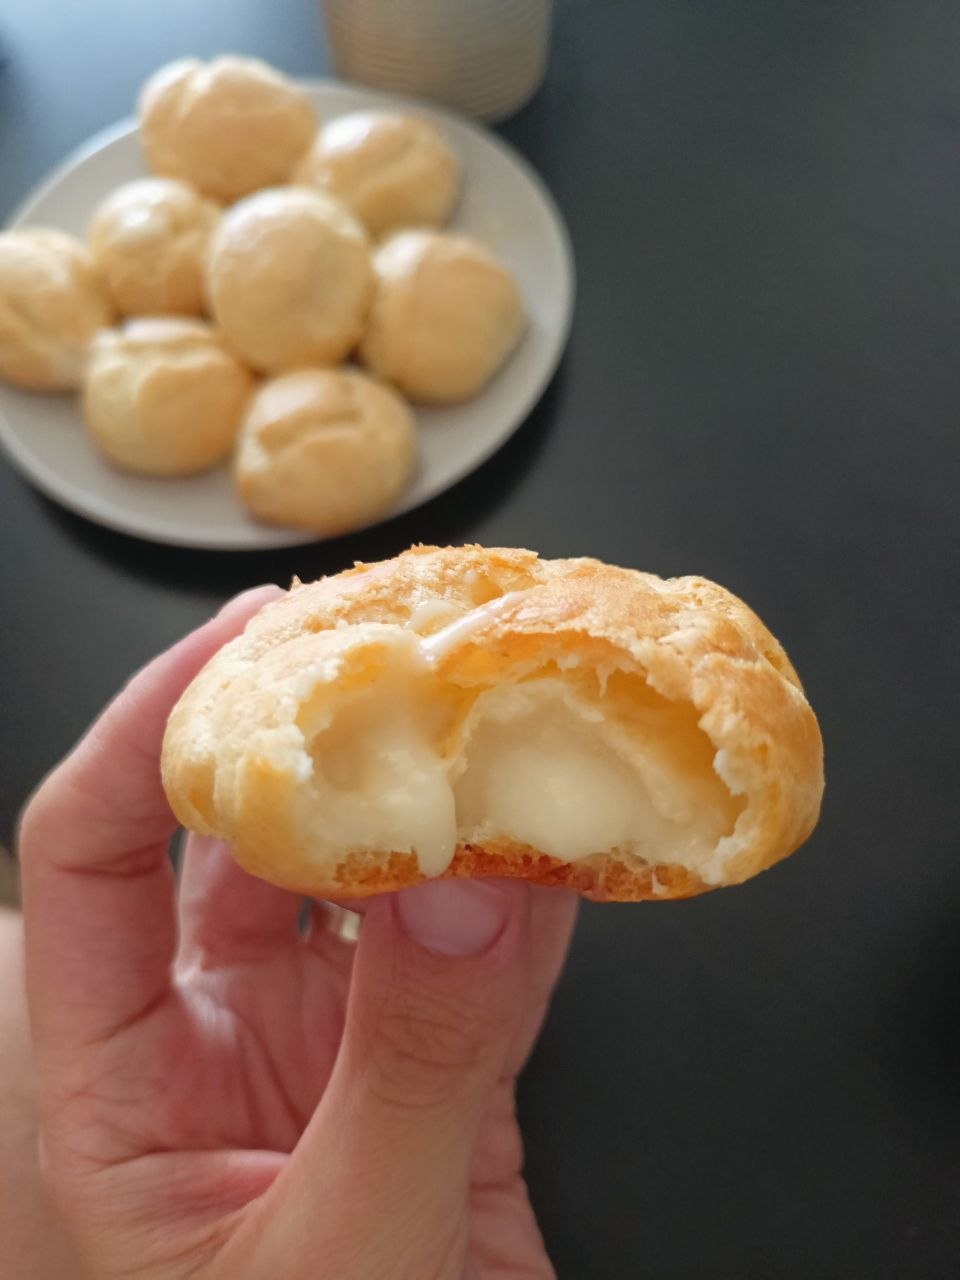
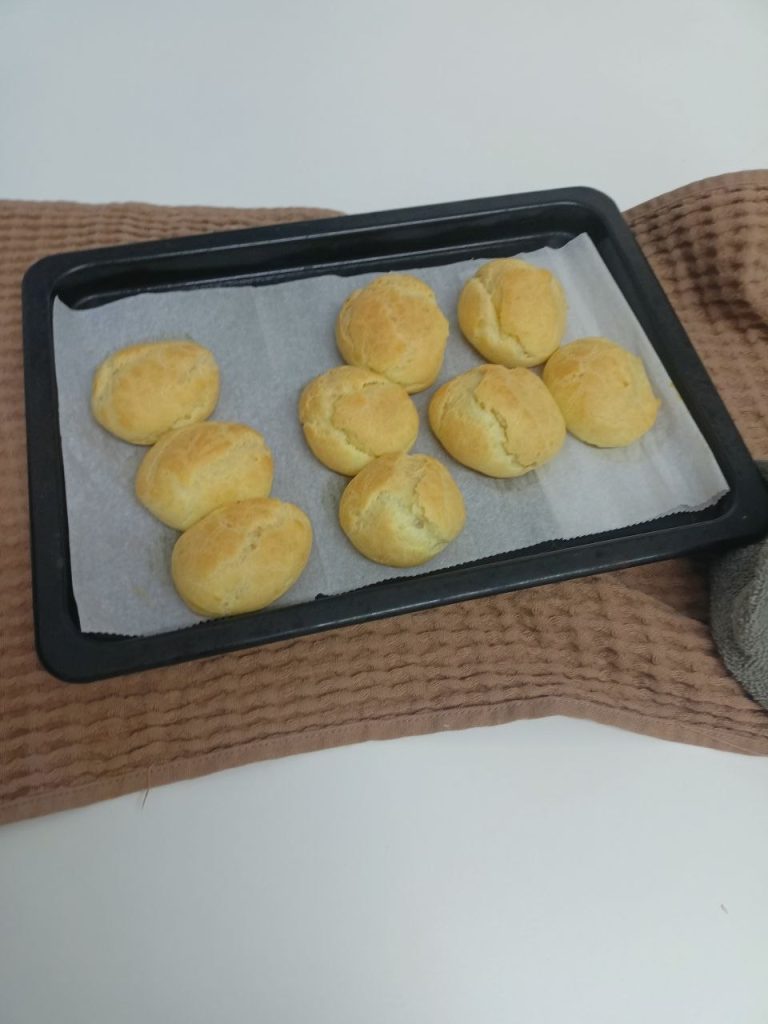
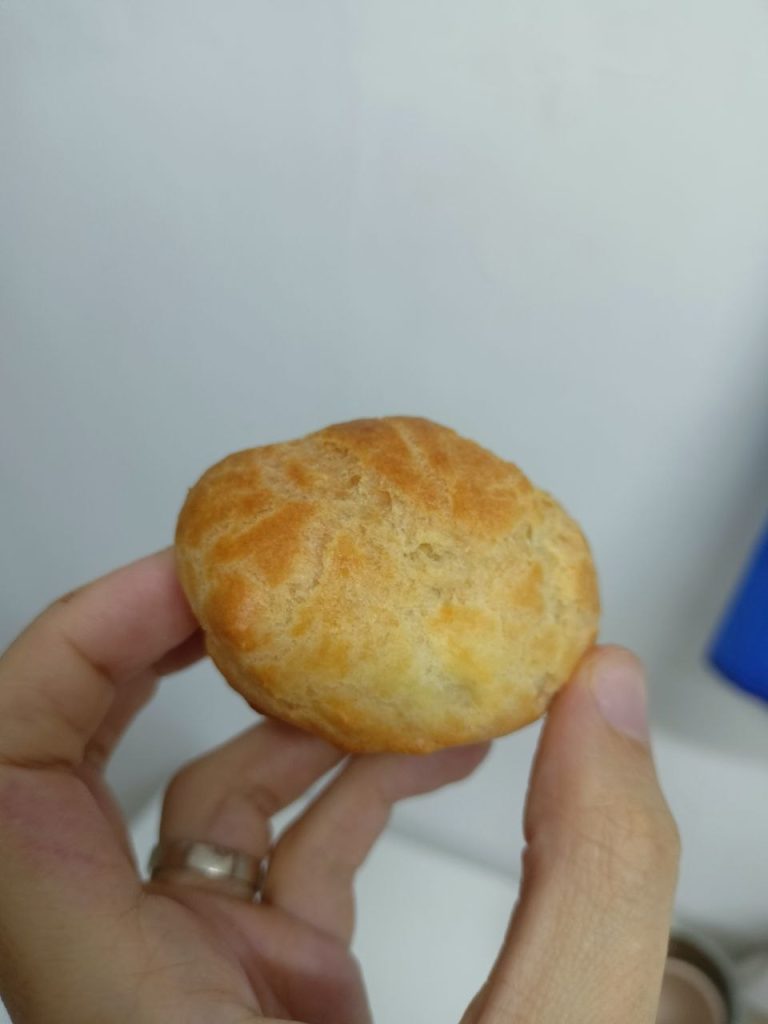
They were beautifully puffed, golden, hollow inside and almost too pretty to believe that I had made them myself.
So if you’ve been avoiding choux pastry because it sounds intimidating, this is me telling you: try it.
What Makes Choux Pastry Different?
Choux pastry is unusual because you don’t make it in the same way as most cakes or cookies.
You begin by cooking water, butter and flour together on the stove. Then you gradually work eggs into the mixture until you have a smooth, glossy dough.
There is no yeast and no traditional chemical leavener such as baking powder.
Instead, the pastry puffs up because of steam. The moisture in the dough turns into steam in the hot oven, expanding inside the pastry and creating the characteristic hollow center. The eggs and flour then help the pastry set around that space.
And that hollow center is what makes choux pastry so much fun.
Once the shells cool, you can fill them with pastry cream, whipped cream, chocolate cream, ice cream or almost anything else you can imagine.
For my first attempt, I went with a simple vanilla custard-style pastry cream.
And it was absolutely worth it.
My Homemade Choux Pastry Experience
I want to say something before getting into the recipe.
Don’t be scared of the ugly stages.
There are several moments during this recipe when you may look at your dough and wonder whether you’ve done something terribly wrong.
When you first add the eggs, the mixture can look split and strange. It doesn’t immediately resemble the beautiful glossy pastry you have probably seen in recipe photos.
Keep mixing.
Once the egg is incorporated, the dough comes together again.
The same thing happens with the pastry cream. It looks like a thin liquid for a while, and then suddenly it thickens.
That’s normal.
And if you’re a beginner like me, I think this is one of the most useful things to know before you start: don’t panic just because your mixture doesn’t look right for a few minutes.
Baking sometimes involves trusting the process before you can see the result.
Ingredients
For the Choux Pastry
- 250 ml water (about 1 cup)
- 100 g butter or margarine (about 7 tablespoons)
- 150 g all-purpose flour (about 1 cup, sifted)
- A pinch of salt
- 4 medium eggs or 3 large eggs, at room temperature
For the Vanilla Pastry Cream
- 500 ml milk (2 cups)
- 2 eggs or 4 egg yolks
- 120–150 g sugar (about ½–⅔ cup, depending on how sweet you like it)
- 30 g cornstarch or all-purpose flour (about 2 tablespoons)
- 50 g butter, softened
- 1 teaspoon vanilla extract or 1 packet vanilla sugar
For finishing:
- Powdered sugar, optional
The ingredients are surprisingly ordinary for something that looks so fancy.
That’s one of the reasons I liked this recipe so much.
Step 1: Make the Pastry Cream First
I recommend making the cream before the choux shells because it needs time to cool.
In a heatproof bowl or medium saucepan, whisk together the sugar, cornstarch or flour, and eggs until the mixture is smooth and pale.
Meanwhile, warm the milk in a separate saucepan until it is steaming and just about to boil.
Slowly pour about half of the hot milk into the egg mixture while whisking constantly.
Don’t pour it all in at once.
The slow addition helps bring the temperatures together without scrambling the eggs.
Pour everything back into the saucepan with the remaining milk and cook over medium-low heat, whisking constantly.
This is one of those moments when you really do need to stay nearby.
The mixture will gradually become thicker.
Then, almost suddenly, it will turn into a proper creamy custard.
Once it has thickened and started bubbling gently, remove it from the heat. Whisk in the butter and vanilla until smooth and glossy.
Transfer the cream to a bowl and cover the surface directly with plastic wrap. The plastic should touch the cream itself; this prevents a skin from forming as it cools.
Let it cool at room temperature for a while, then refrigerate until completely chilled.
Step 2: Make the Choux Dough
Now for the part that had always intimidated me.
Put the water, butter and salt into a heavy-bottomed saucepan.
Bring everything to a proper boil over medium heat, making sure the butter has completely melted.
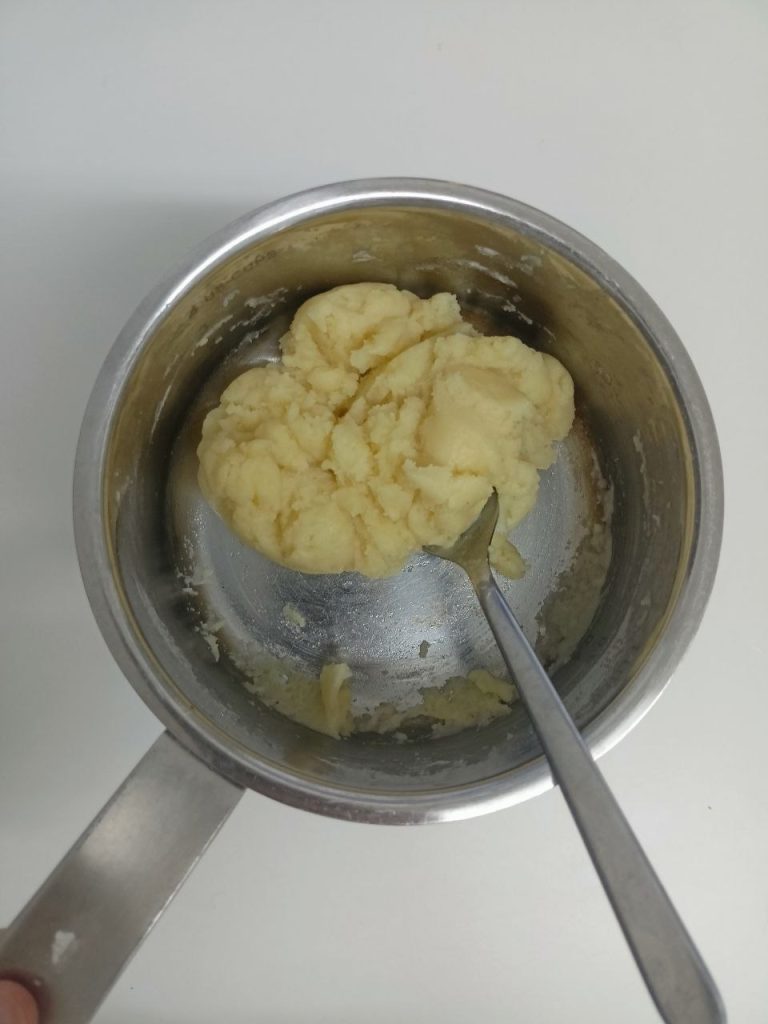
Once it is boiling, reduce the heat and add all of the flour at once.
Yes, all of it.
Immediately start stirring vigorously with a sturdy silicone spatula or wooden spoon.
The mixture will quickly turn into a thick dough.
Keep stirring until it becomes smooth and pulls away from the sides of the pan. You should see a light film forming on the bottom of the saucepan.
This took me roughly a minute or two.
Transfer the dough to a bowl and let it cool for about 5 minutes.
You want it warm, but not so hot that you’re putting raw eggs straight into a scorching mixture.
Step 3: Add the Eggs Slowly
This is probably the part that sounds more frightening than it actually is.
Add the eggs one at a time, mixing thoroughly after each addition.
At first, the dough may look completely wrong.
It can become slippery and almost curdled-looking when you add an egg.
Don’t worry.
Keep mixing.
Once the egg is incorporated, the dough becomes smooth again. Then add the next egg.
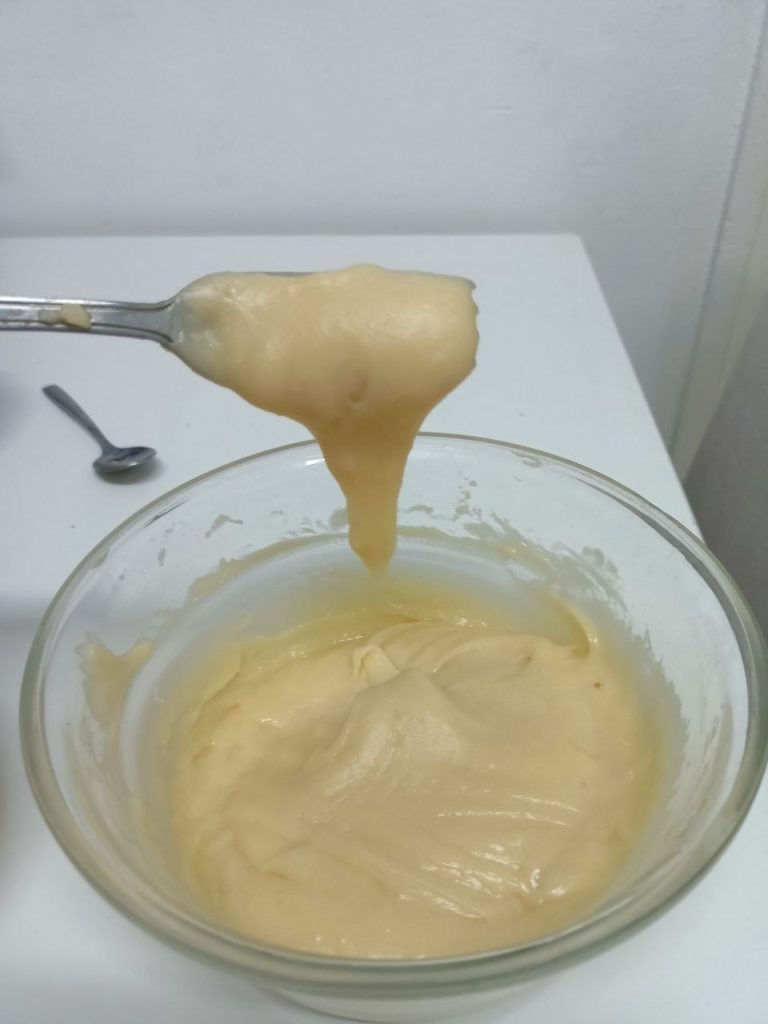
After the final egg, you want a smooth, glossy dough that is soft enough to pipe but still holds its shape.
One useful visual test is to lift your spatula.
The dough should fall from it in a slow, thick V shape rather than running off like a liquid.
And here’s where I made my own little discovery.
My Choux Pastry Resting Experiment
The recipe I followed suggested letting the dough rest for around 10–15 minutes before piping.
I did that with my first batch.
It worked.
But then, because I wasn’t making everything at once, the remaining dough sat on the counter longer before I baked the next batch.
And somehow, the second batch turned out even better.
I got fewer pastries from it — only about four — but they were gorgeous.
They puffed beautifully and looked almost ridiculously professional compared with what I had expected from my little kitchen.
So, based entirely on my own experience, I’d be comfortable letting the finished dough rest for around 15–30 minutes before piping.
I wouldn’t call this a guaranteed secret or a rule you have to follow. Choux pastry recipes differ, and the dough’s consistency matters more than blindly following a clock.
But if you have the time, it certainly worked beautifully for me.
Step 4: Pipe and Bake
Preheat your oven to 200°C (400°F).
Line a baking tray with parchment paper.
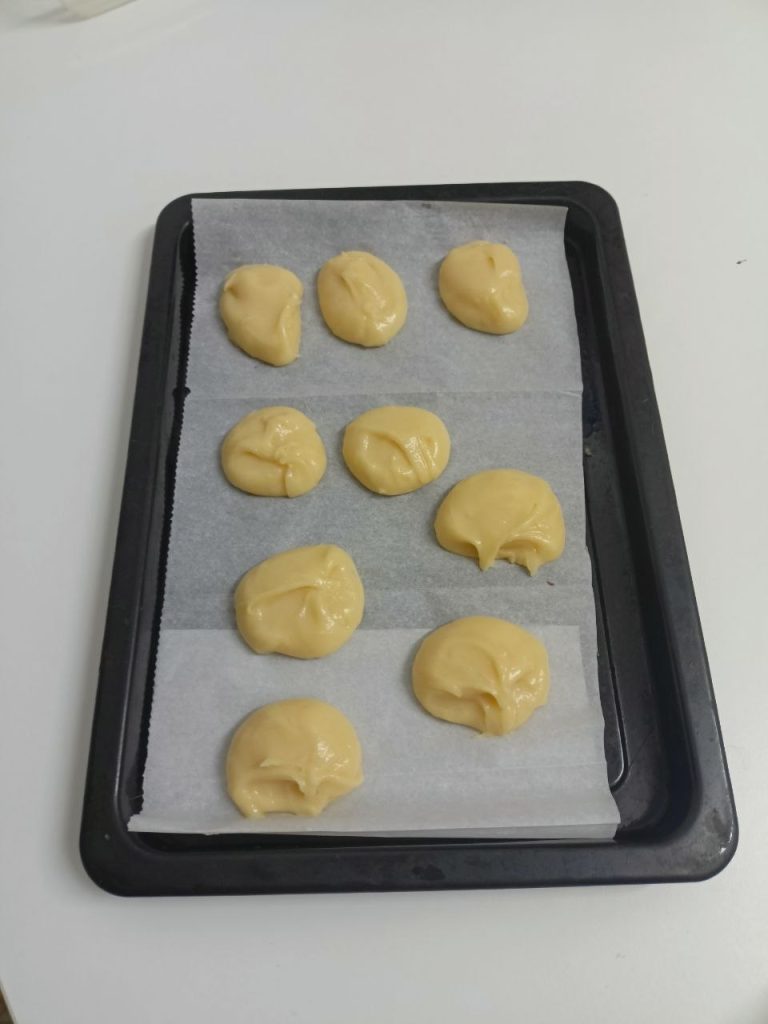
Pipe small mounds of dough onto the tray, leaving plenty of space between them because they will expand.
If you don’t have a piping bag, don’t let that stop you.
You can use a sturdy plastic bag with the corner snipped off, or carefully spoon the dough onto the baking sheet.
They may not look perfectly identical.
That’s okay.
Mine certainly weren’t.
And once they puff up, nobody is going to care about perfectly uniform shapes.
The Important Part: Don’t Open the Oven
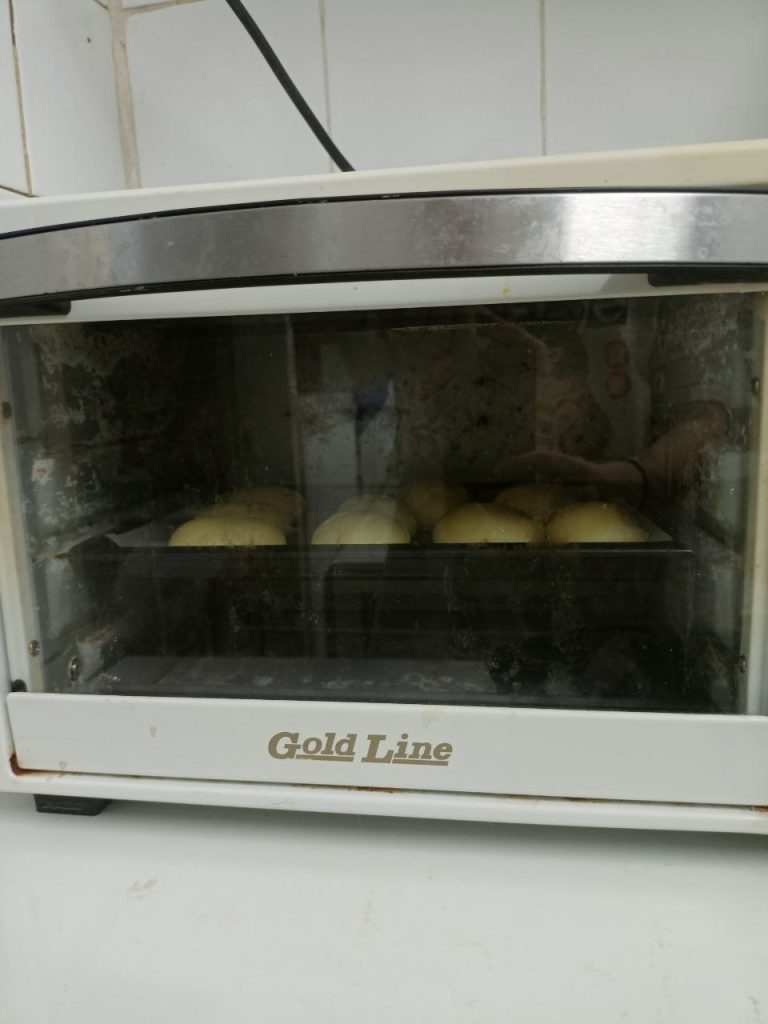
Bake the choux at 200°C (400°F) for about 15 minutes.
Keep the oven door closed.
This is not the moment to peek every five minutes.
The pastry needs that hot, steamy environment to puff properly.
After the initial 15 minutes, lower the temperature to 180°C (350°F) and continue baking for another 10–15 minutes, until the shells are firm and nicely golden.
Finally, turn off the oven, crack the door open slightly and let the pastries sit inside for about 5 minutes.
Then transfer them to a wire rack and let them cool completely.
The exact baking time may vary with your oven and the size of your pastries. My oven is small and definitely isn’t a professional pastry oven, so this was another pleasant surprise for me: you really don’t need fancy equipment to get a great result.
How to Know If Your Choux Pastries Worked
When the pastries are completely cool, gently pick one up.
It should feel surprisingly light.
Make a small opening in the bottom or side.
Inside, you should find a hollow space.
That empty space is exactly what we wanted.
If your shells are a little soft straight out of the oven, don’t immediately assume you’ve ruined them. Choux pastry needs to dry properly inside as well as brown on the outside.
If a shell looks beautiful but collapses as soon as it cools, it may simply need more drying time.
That’s one reason I prefer to bake until the shells feel properly firm rather than relying only on their color.
The first time you make them, you may need to learn how your own oven behaves.
That’s okay.
I certainly did.
Step 5: Fill the Choux Pastry
Once the shells and pastry cream are completely cool, you’re finally at the fun part.
Make a small hole in the bottom or side of each pastry.
Pipe the chilled cream inside.
You can also cut off the top of each shell, fill the bottom and replace the top if you prefer the classic cream-puff look.
Then dust everything with powdered sugar.
And suddenly you have something that looks like an actual bakery dessert.
Which, for me, was honestly the most satisfying part.
I started this recipe thinking, I don’t know if I can make choux pastry.
A couple of hours later, I was holding one in my hand thinking, Wait… I actually made this.
That feeling is worth a lot more than the powdered sugar on top.
My Tips If You’re Nervous About Making Choux Pastry
Don’t try to make every pastry identical. Especially for your first attempt, focus on getting the dough right rather than making perfectly shaped little puffs.
Don’t panic when you add the eggs. The dough can look completely wrong before it suddenly becomes smooth again.
Keep the oven closed during the first stage. The rising pastry needs the heat and steam.
Give the shells enough time to dry. A golden outside doesn’t necessarily mean the inside is ready.
Pay attention to your dough rather than only the recipe’s clock. The final consistency matters more than whether you mixed for exactly 90 seconds.
And finally:
Don’t be intimidated by the name.
“Choux pastry” sounds much more complicated than “water + butter + flour + eggs that magically puff up in the oven.”
Okay, there is a little more to it than that.
But not that much more.
Can a Beginner Really Make Choux Pastry?
I think the answer is yes.
I’m not a pastry chef.
I don’t have a professional oven.
I don’t have a huge collection of expensive baking equipment.
And before making these, I genuinely thought choux pastry was one of those desserts that was probably beyond my level.
It wasn’t.
Was it more involved than making a simple brownie or an easy homemade bread?
Definitely.
There are more stages, and you need to pay attention to what the dough is doing.
But that doesn’t mean it is difficult.
And there is something incredibly satisfying about making a dessert that looks complicated from the outside and discovering that the technique is actually manageable.
My first batch was good.
My second batch looked almost suspiciously professional.
So if you’ve been staring at cream puffs in a bakery window and thinking, I’d never be able to make those, maybe give them a chance.
You might surprise yourself.
I certainly did.
If you’re enjoying homemade yeast and pastry desserts, you might also like my Easy Homemade Cruffin Recipe.
Homemade Choux Pastry with Custard Cream
Choux pastry
| Ingredient | US / metric |
|---|---|
| Water | 1 cup / 250 ml |
| Butter or margarine | 7 tbsp / 100 g |
| All-purpose flour | about 1 cup / 150 g |
| Salt | pinch |
| Eggs | 4 medium or 3 large |
Pastry cream
| Ingredient | US / metric |
|---|---|
| Milk | 2 cups / 500 ml |
| Eggs | 2 eggs or 4 yolks |
| Sugar | ½–⅔ cup / 120–150 g |
| Cornstarch or flour | about 2 tbsp / 30 g |
| Butter | about 3½ tbsp / 50 g |
| Vanilla | 1 tsp |
Method at a glance
- Make and chill the pastry cream.
- Boil water, butter and salt.
- Add flour and cook until a smooth dough forms.
- Cool slightly.
- Add eggs one at a time.
- Rest the dough for 15–30 minutes if desired.
- Pipe onto parchment.
- Bake at 200°C/400°F for 15 minutes.
- Lower to 180°C/350°F and bake another 10–15 minutes.
- Cool completely.
- Fill with chilled pastry cream.
- Dust with powdered sugar.